Managing Liquidity Pools - Step-by-Step Instructions

mimo is a decentralized exchange (DEX) with automated liquidity on IoTeX. Instead of a centralized order book, mimo utilizes liquidity pools and automated market making (AMM) algorithms to connect buyers and sellers of crypto-assets in a decentralized fashion. mimo allows anyone to trade or provide liquidity for various pairs of assets, where those that provide liquidity for a specific pool will share the transaction fees from trading.
- mimo website: https://mimo.finance
- mimo exchange: https://mimo.exchange
In this thread, we share step-by-step instructions to manage liquidity pools on mimo.
Step 1: Connect to IoPay Wallet
On Desktop:
- Install ioPay Desktop Wallet – Download
- In your browser navigate to mimo.exchange
- Click on “Connect Wallet” then unlock your IoPay wallet
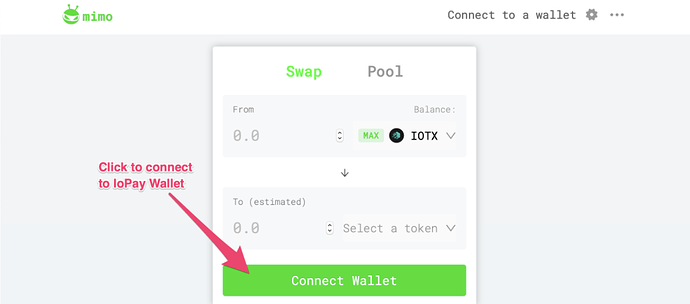
On mobile:
- Install ioPay Mobile Wallet – Download
- Inside ioPay app select “Discover” tab and navigate to mimo.exchange
- Click OK to confirm the connection with the wallet
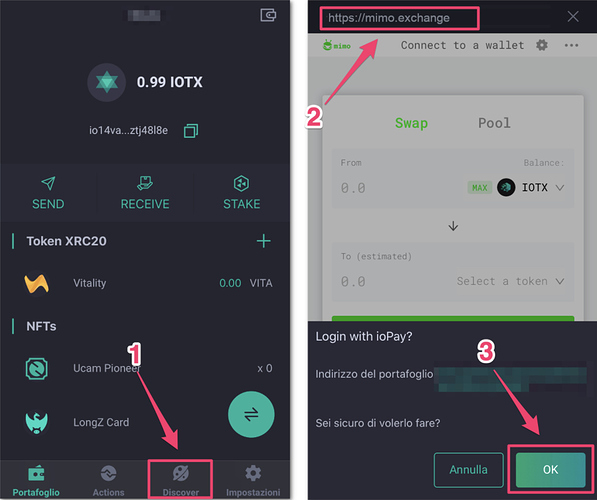
Step 2: Access the Pool tab
Now that mimo.exchange is connected to your ioPay Wallet, make sure you select the POOL tab:
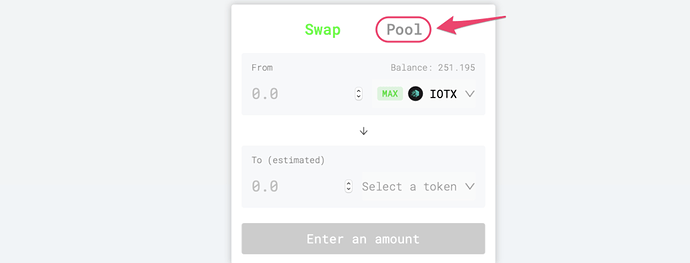
From the Pool tab you can create and add a new liquidity pool, as well as see a list of all the pools for which you already provided liquidity.

Step 3a: Create a new liquidity pool
To create a new pool, click the “Add Liquidity” button.

- Set the amount of IOTX to add to the pool
- Choose the second token in the pair
- Review the amount of the second token to be added (based on the new price generated by your liquidity addition). Alternatively, you can adapt the amount of the second token, and the amount of IOTX will auto-adapt accordingly
- If you had already created a pool for the same pair, you can see your position in the box at the bottom
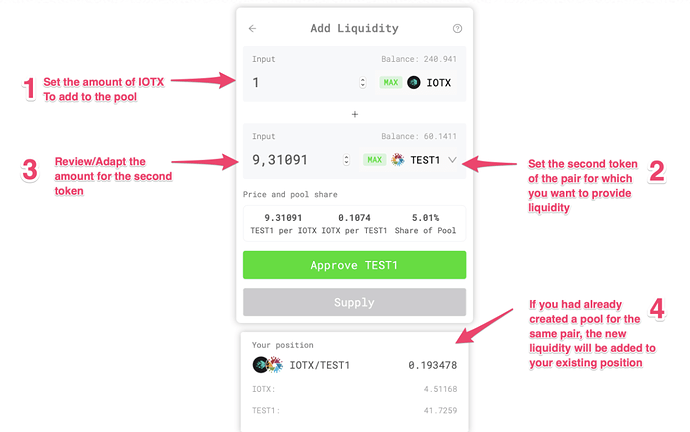
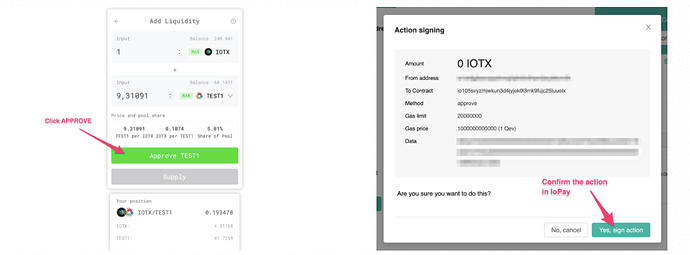
- Click the “Approve” button to allow the mimo.exchange to transfer your tokens
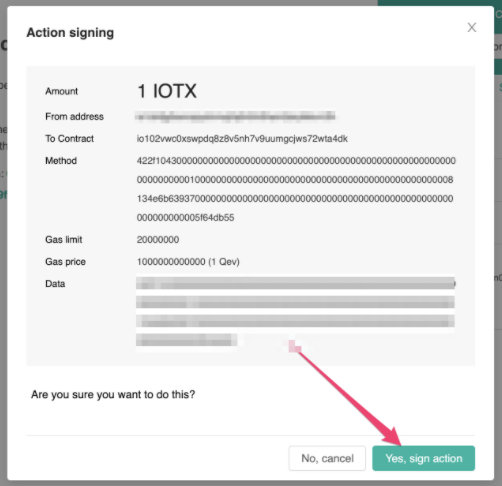
- Sign the action in your ioPay Wallet
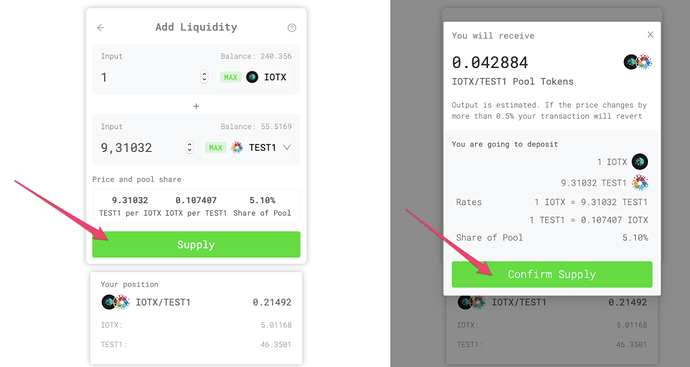
Once the token approval is confirmed,
- Click the “SUPPLY” button to allow the DEX to transfer your tokens
- Review the summary of your operation and click “CONFIRM SUPPLY”
- Sign the action in ioPay
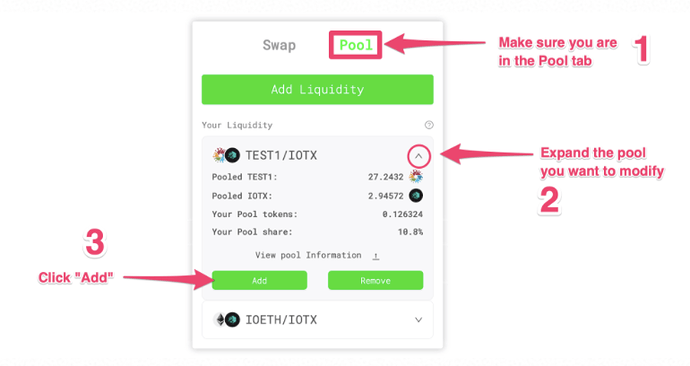
Step 3b) Add liquidity to an existing position
If you already own a position in a liquidity pool, you can add more liquidity to that at any time. To add liquidity to a pool:
- Make sure you are in the POOL tab
- Expand the pool you want to withdraw from
- Click “Add”
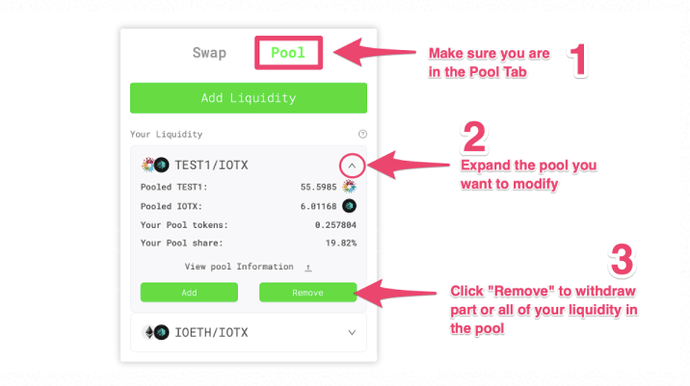
Step 3c) Remove liquidity from an existing position
You can withdraw some or all of your liquidity in a pool at any time. To remove liquidity from a pool:
- Make sure you are in the “POOL” tab
- Expand the pool you want to withdraw from
- Click “Remove”
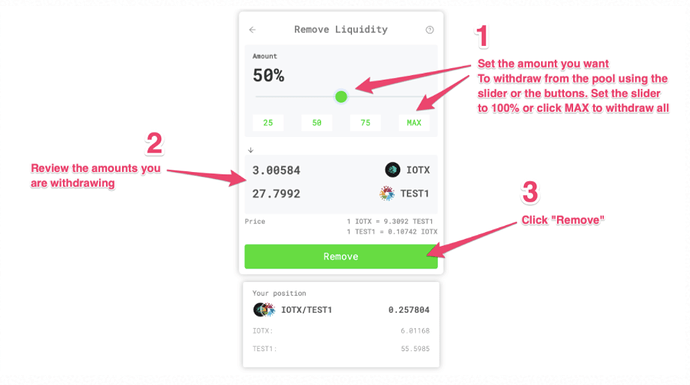
In the Remove Liquidity section
- Use the slider or the buttons to set the percentage of the the tokens that you want to withdraw from the pool (set the slider to 100% or click “MAX” to remove and withdraw your entire liquidity)
- Review the amount of tokens you are removing from the pool
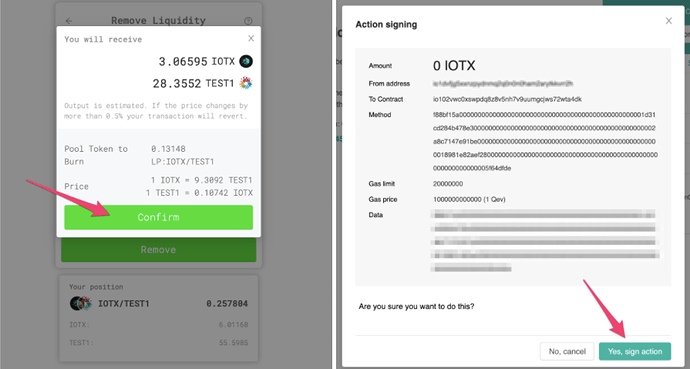
- When you are ready, click " Remove "
